
Arduino เชื่อมต่อกับ Database (Database to Arduino)
 Arduino เชื่อมต่อกับ Database (Database to Arduino)
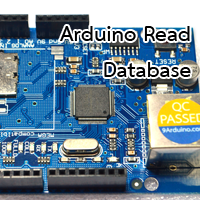
ดีครับ จากวันก่อนมีน้องๆ ในกลุ่ม Arduino Thailand เข้ามาถามเรื่องการให้ Arduino อ่านค่าจาก Database (Mysql) วันนี้เลยทำบทความเล่นๆ อ่านเข้าใจง่ายถึงวิธีการง่าย (แต่ไม่ปลอดภัยหากใช้งานจริง) เผื่อเอาไปใช้กับโปรเจคนักเรียนนักศึกษา มาเริ่มกันเลย
ก่อนอื่นจะอธิบายหลักการทำงานก่อน
- ขั้นที่ 1 น้องๆ ต้องออกแบบ เว็บไซต์ไม่ว่าจะเป็นภาษา Html php asp.net แล้วแต่น้องชอบ ดึงขอมูล จาก Database มาแสดงบนเว็บไซต์ ก่อน อาจจะระบุ ว่า Output= เพื่อให้ Arduino ค้นหาข้อมูลจากเว็บไซต์
- ขั้นที่ 2 น้องๆ ก็ให้ Arduino อ่านหน้าเว็บไซต์ และ ค้นหาตัวแปรที่เราต้องการเช่น จากตัวอย่าง พี่ให้ Arduino อ่านหน้าเว็บไซต์ ค้นหาคำว่า "Output=" แล้วนำค่าด้านหลังที่ได้มาเก็บในตัวแปรชนิด Int ของ Arduino
ก็จบขั้นตอนง่ายๆ แบบไม่ปลอดภัย ในกรณีที่จำนำไปใช้จริงควรจะ มีการเข้ารหัส
เครื่องมือที่ต้องใช้
- Arduino Uno R3
- Ethernet shield w5100
- Server หรืออาจจะจำลอง Server โดยใช้ Appserve หรือ Xamp
- Web Server ไม่ว่าจะเป็น IIS หรือ apache
- PHP จากตัวอย่างเลือกใช้ 5.6
- Mysql
- อุปกรณ์ เครื่อข่าย Network
ไฟล์ ทั้งหมด

สำหรับลูกค้าของร้าน Ab-Maker มี Source Code อธิบายการทำงานต่างๆ
พร้อมกับคำแนะนำขั้นต้น เพื่อให้สามารถนำไปพัฒนาต่อได้เลย
Email : [email protected]
สร้าง Database ก่อน พี่เลือกใช้ Mysql
CREATE TABLE `test` (
`id` int(11) NOT NULL auto_increment,
`data` int(11) NOT NULL,
PRIMARY KEY (`id`)
) ENGINE=MyISAM DEFAULT CHARSET=utf8 AUTO_INCREMENT=2 ;
INSERT INTO `test` VALUES (1, 152);
ตัวอย่าง Code ฝั่ง php ไฟล์ Index.php
www.ab.in.th
require_once("config.php");
$sql = "SELECT * FROM test WHERE id = 1;";
$result = mysql_query($sql);
$num_record = mysql_num_rows($result);
while ($dbarr = mysql_fetch_row($result)) {
echo "output=";
echo "$dbarr[1]";
}
?>
ไฟล์ Config.php เพื่อเชื่อมต่อกับ Server
$host = "localhost";$user = "root";
$pass = "123456";
$db = "testtdbs";
mysql_connect($host, $user, $pass) or die("Could not connect to database");
mysql_select_db($db) or die("Could not connect to database");
mysql_query("SET NAMES utf8")
?>
ตัวอย่าง Code ฝั่ง Arduino + Ethernet shield w5100
#include <SPI.h>
#include <Ethernet.h>
byte mac[] = {
0xDE, 0xAD, 0xBE, 0xEF, 0xFE, 0xED
};
IPAddress ip(192, 168, 1, 177);
IPAddress myDns(192, 168, 1, 1);
EthernetClient client;
//char server[] = "arduino.nisit.net"; //กรณีใช้เป็น Domain จะต้อง ตั้งค่า DNS ที่
myDns ด้วยIPAddress server(103,233,194,42); //กรณีใช้เป็น IP
unsigned long lastConnectionTime = 0; // last time you connected to the server, in milliseconds
const unsigned long postingInterval = 10L * 1000L; // delay between updates, in milliseconds
int value;
void setup() {
Serial.begin(9600);
while (!Serial) {
;
}
delay(1000);
Ethernet.begin(mac, ip, myDns);
// print the Ethernet board/shield's IP address:
Serial.print("My IP address: ");
Serial.println(Ethernet.localIP());
}
void loop() {
if (client.available()) {
//char c = client.find("output=");
//Serial.write(c);
}
if (millis() - lastConnectionTime > postingInterval) {
httpRequest();
if(client.find("")){
client.find("output="); // ค้นหาคำว่า output= ในเว็บ แล้วดึงค่าตัวแปรออกมาแสดง
value = client.parseFloat();
Serial.print("Output = ");
Serial.println(value);
}
}
}
void httpRequest() {
client.stop();
if (client.connect(server, 80)) {
Serial.println("connecting...");
// send the HTTP GET request:
client.println("GET /~file/readmysql/index.php HTTP/1.1"); // Url ที่ต้องการวิ่งไปอ่านไฟล์
client.println("Host: www.arduino.cc");
client.println("User-Agent: arduino-ethernet");
client.println("Connection: close");
client.println();
lastConnectionTime = millis();
} else {q
Serial.println("connection failed");
}
}
สำหรับลูกค้าของร้าน 9Arduino มี Source Code อธิบายการทำงานต่างๆ
พร้อมกับคำแนะนำขั้นต้น เพื่อให้สามารถนำไปพัฒนาต่อได้เลย
Email : [email protected]
จบขั้นตอนการดึงค่าจาก Database ครับ หวังว่าจะสามารถนำไปพัฒนาได้ในอนาคตน่ะครับ

Join เป็นสมาชิกร้านค้า

064-208-3926
ติดต่อเวลา 10.00-17.00 น.
จันทร์ ถึงวัน ศุกร์
![]()
![]()


TOP เลื่อนขึ้นบนสุด
